
Grafting is a common and effective method for propagating roses. It allows you to combine the desirable characteristics of one rose variety (the scion) with the rootstock of another rose plant for better growth and disease resistance. Here’s a step-by-step guide on how to grow roses by grafting:
Materials you will need:
- Rootstock rose plant (usually a hardy and disease-resistant variety)
- Scion rose plant (the variety you want to propagate)
- Sharp grafting knife or utility knife
- Grafting tape or rubber bands
- Pruning shears or clippers
- Rooting hormone (optional)
- Plastic bag or plastic wrap (for humidity control)
- Pot or planting location with well-draining soil
Steps:
- Select the rootstock plant: Choose a healthy rootstock rose plant that is well-suited to your climate and soil conditions. The rootstock should be disease-resistant and vigorous. Typically, you can purchase rootstock plants from a nursery.
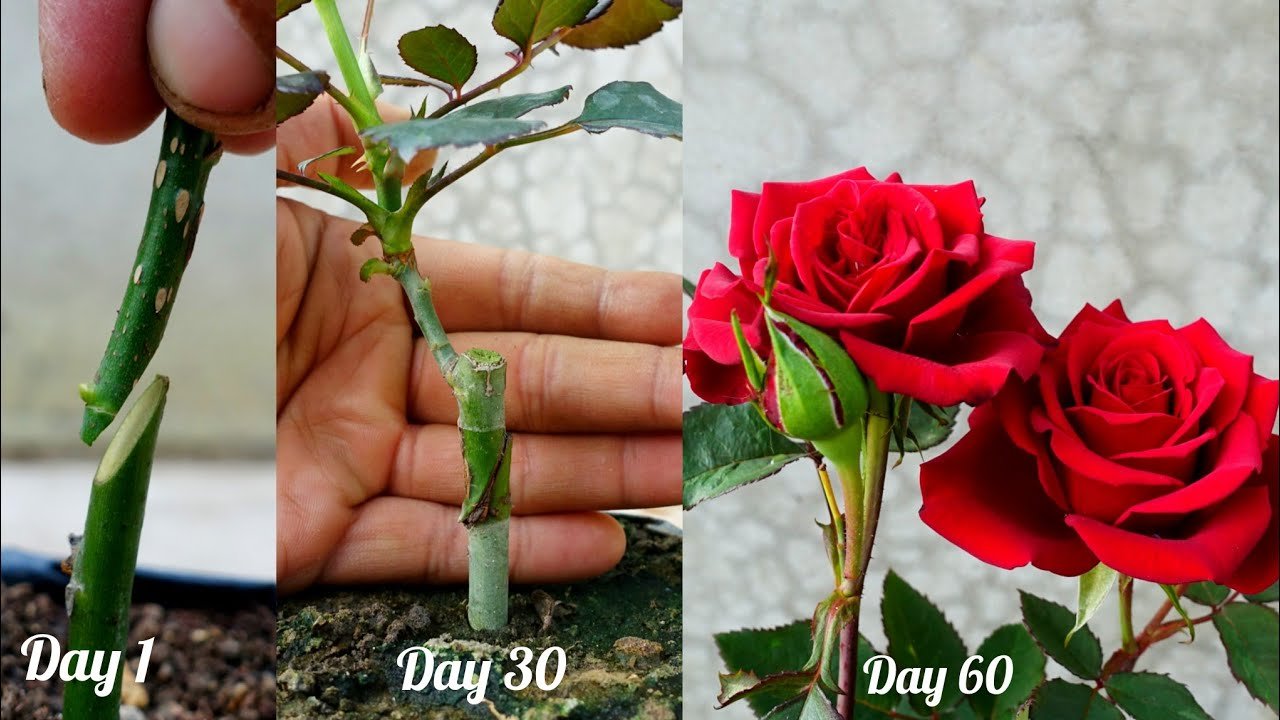
- Choose the scion: Select a healthy scion from the rose variety you wish to propagate. The scion should be a young stem with at least two or three buds. It’s best to take scion wood in the dormant season (late winter or early spring) when the rose plant is not actively growing.
- Prepare the rootstock: Cut the rootstock rose plant down to just above the ground, leaving a straight, sturdy stem (about the thickness of a pencil) for grafting. Make a clean, diagonal cut with your grafting knife.
- Prepare the scion: Cut the selected scion from the donor plant, making a diagonal cut just below a bud. Ensure that the scion is roughly the same diameter as the rootstock stem. If the scion has multiple buds, cut it into smaller sections, each with at least one bud.
- Make the graft: There are several types of grafting methods, but the most common for roses is the “T-bud” or “T-graft.” Make a T-shaped incision about 1-1.5 inches long on the rootstock stem, near the top, and gently lift the bark to create a flap.
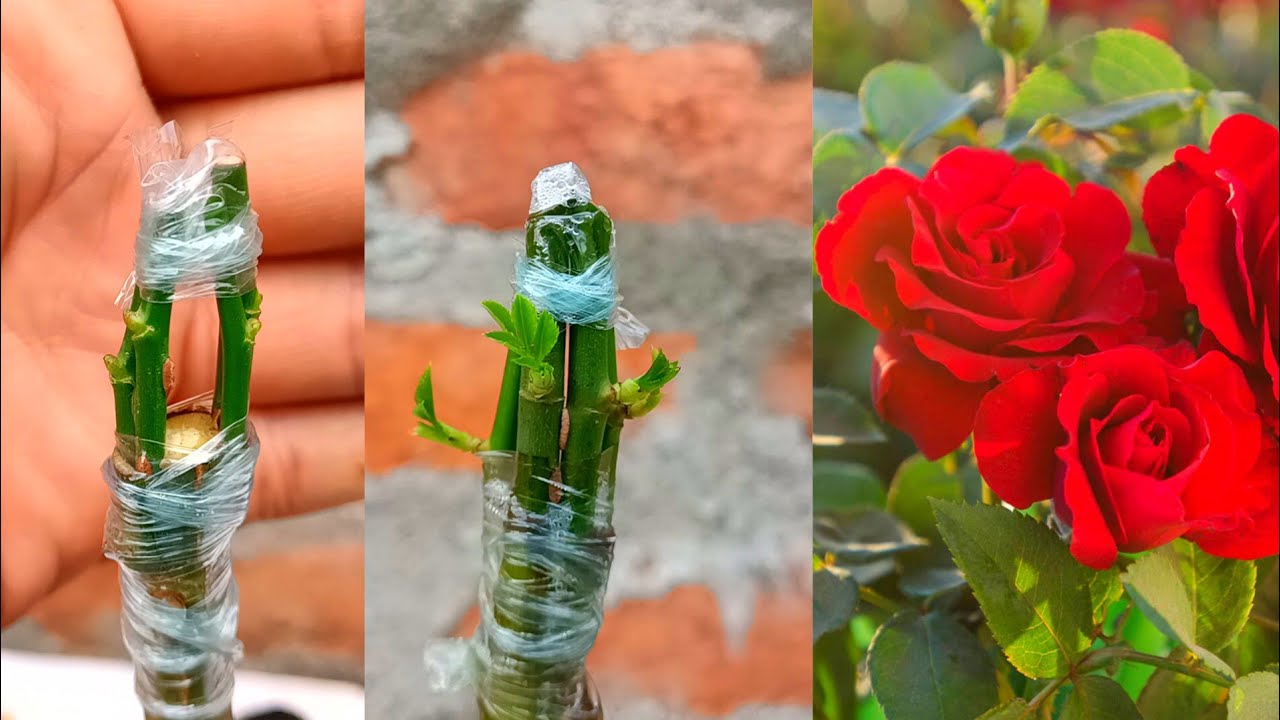
- Insert the scion: Insert the prepared scion into the flap, making sure the cut surfaces of the scion and rootstock match as closely as possible. The bud on the scion should be facing outward. Secure the graft with grafting tape or rubber bands, ensuring it’s tight but not too constricting.
- Cover and protect: To maintain humidity and protect the graft, you can place a plastic bag or plastic wrap over the grafted area. Leave it in place for a few weeks while the graft union heals.
- Monitor and maintain: Keep an eye on the graft site and remove any growth that appears below the graft union. This ensures that the rootstock doesn’t send up its shoots, which can overtake the scion.
- Transplant: Once the graft has taken and shows signs of growth (usually in a few weeks to a few months), you can transplant the grafted rose to its permanent location in well-draining soil. Be sure to keep it well-watered and provide proper care as the plant establishes itself.
Grafting roses can be a bit challenging for beginners, so it’s a good idea to practice on less valuable plants or seek guidance from experienced gardeners if you’re new to grafting. With practice and patience, you can successfully propagate roses with this method.