
Roses, with their timeless beauty and enchanting fragrance, are a coveted addition to any garden. While purchasing new rose plants can add up in costs, propagating roses from cuttings offers a budget-friendly and rewarding alternative. Not only does propagating roses save you money, but it also allows you to expand your garden with beloved varieties. In this guide, we’ll explore the simple yet effective process of propagating roses from cuttings, empowering you to grow more roses without breaking the bank.
Why Propagate Roses from Cuttings?
- Cost-Effective: Propagating roses from cuttings eliminates the need to purchase new plants, saving you money on garden expenses.
- Preserve Favorite Varieties: Propagating allows you to replicate and preserve specific rose varieties that thrive in your garden or hold sentimental value.
- Controlled Growth: Starting roses from cuttings gives you control over the plant’s growth from its early stages, ensuring healthy development and desired characteristics.
Materials Needed:
- Healthy Rose Cuttings: Select 6-8 inch (15-20 cm) cuttings from healthy, disease-free rose stems. Choose stems with a diameter similar to a pencil and containing at least 2-3 leaf nodes.
- Sharp Pruning Shears: Use clean, sharp pruning shears to make precise cuts, reducing the risk of damaging the cuttings.
- Rooting Hormone (Optional): A rooting hormone powder or gel can promote faster root development in your rose cuttings.
- Potting Mix: Prepare a well-draining potting mix suitable for rooting cuttings, such as a mix of perlite, vermiculite, and peat moss.
- Pots or Containers: Use small pots or containers with drainage holes to plant and root your rose cuttings.
Step-by-Step Propagation Process:
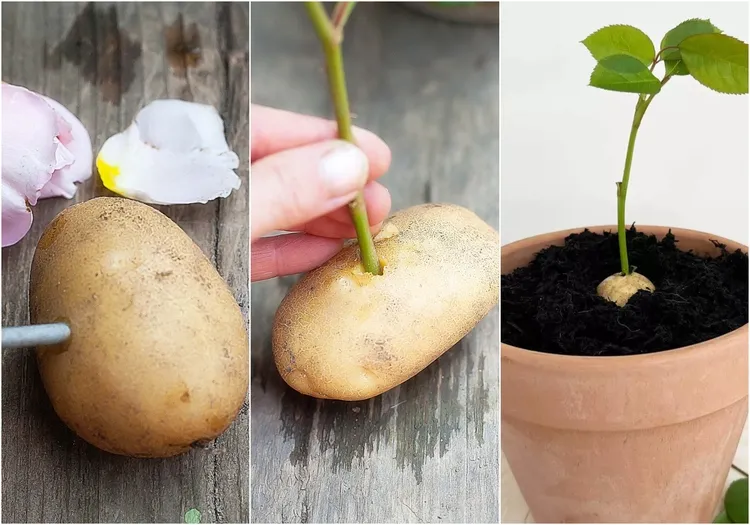
- Prepare Cuttings: Take cuttings in early summer when rose stems are semi-hardwood. Trim each cutting just below a leaf node at a 45-degree angle, removing any flowers or buds.
- Apply Rooting Hormone (Optional): Dip the cut end of each rose cutting into rooting hormone powder or gel to encourage root growth.
- Plant Cuttings: Insert each cutting about 2 inches (5 cm) deep into the prepared potting mix in a pot or container. Firmly press the soil around the cutting to ensure good contact.
- Provide Ideal Conditions: Place the pots in a location with bright, indirect sunlight. Maintain consistent moisture in the soil without waterlogging, as excessive moisture can lead to rot.
- Monitor and Maintain: Regularly check the soil moisture level and mist the cuttings if the environment is dry. Avoid overwatering, as it can hinder root development.
- Root Development: Over the next few weeks to months, monitor the cuttings for signs of new growth and root development. Gently tug on the cuttings to check for resistance, indicating root growth.
- Transplanting: Once roots have developed sufficiently (typically in 8-12 weeks), transplant the rooted cuttings into larger pots or directly into your garden beds. Continue to care for them as you would established rose plants.
Tips for Success:
- Timing Matters: Take cuttings during the cooler parts of the day to prevent wilting. Early morning or late afternoon is ideal.
- Consistent Care: Maintain consistent moisture and avoid extreme temperature fluctuations during the rooting phase.
- Patience is Key: Rooting rose cuttings takes time, so be patient and provide consistent care until roots develop.
By following these steps and tips, you can successfully propagate roses from cuttings and enjoy a bountiful garden filled with your favorite rose varieties. Embrace the joy of growing roses while saving on gardening costs, and marvel at the beauty of your propagated rose plants blooming in abundance.