
Hydrangeas, with their stunning blooms and lush foliage, are a beloved addition to any garden. While purchasing mature plants is common, propagating hydrangeas from cuttings offers a rewarding and cost-effective alternative. In this comprehensive guide, we’ll delve into the intricacies of propagating hydrangea cuttings, from selecting the perfect stem to nurturing its growth.
**Step 1: Selecting the Cutting**
Begin by selecting a healthy stem from a mature hydrangea plant. Opt for a stem that is at least one year old, with a brownish tint. Ensure it is taken from the mother plant as close to the soil as possible, maximizing its potential for rooting.
**Step 2: Preparing the Cutting**
With sharp, clean shears, cut the stem at a 45-degree angle, ensuring it is between 15 to 20 centimeters long and possesses at least two leaf nodes. Remove any flowers or buds, as they can divert energy from root development. The top cut should be diagonal, while the bottom cut should be straight, aiding in water absorption.
**Step 3: Planting the Cutting**
Prepare a well-draining potting mix using a blend of sand, perlite, and peat moss in equal parts. Moisten the mixture to create a damp, but not saturated, environment for root development. Dip the bottom end of the cutting into rooting hormone powder to encourage root growth, then gently insert it into the prepared soil, ensuring at least one leaf node is buried beneath the surface.
**Step 4: Providing Care**
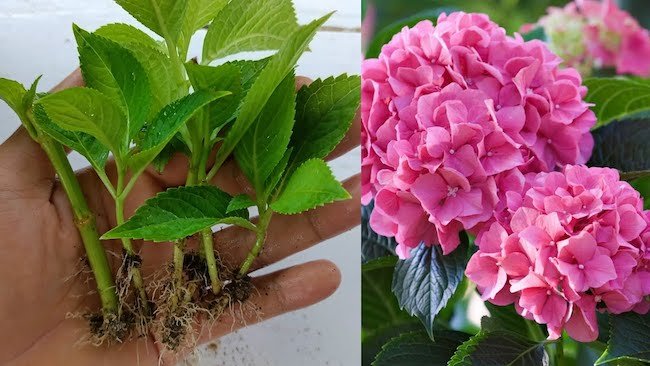
Place the potted cutting in a warm, bright location away from direct sunlight. Keep the soil consistently moist but not waterlogged to prevent rot. A mini greenhouse or plastic bag can be used to create a humid environment, promoting root formation. Check for root development after a few weeks by gently tugging on the cutting—if there is resistance, roots have likely formed.
**Step 5: Transplanting**
Once roots have established, typically after two to three months, transplant the cutting into a larger container or directly into the garden. Gradually acclimate it to outdoor conditions to prevent shock. Monitor its growth, providing regular water and fertilizer as needed.
**Step 6: Pruning and Maintenance**
As the cutting grows, prune away any weak or crossing branches to encourage a strong, healthy structure. Maintain consistent moisture and provide occasional fertilizer during the growing season to support vigorous growth and abundant blooms.
By following these steps, you can successfully propagate hydrangea cuttings and enjoy a flourishing garden filled with these captivating flowers. Experiment with different varieties and techniques to discover what works best in your garden. Happy gardening!
Remember, gardening is a journey of patience and experimentation. Embrace the process and celebrate each milestone as your propagated hydrangea thrives and flourishes in its new environment.