
Gardening enthusiasts often seek the simplest and most effective methods to cultivate their plants, and growing tomatoes from slices is a technique that combines simplicity with efficiency. This guide is designed to walk you through the process of turning a regular tomato into flourishing tomato plants, employing a method that is not only easy but also remarkably quick.
#### Step 1: Preparing Your Pot
The journey from tomato slice to plant begins with the right foundation—a pot filled with well-moistened substrate. This substrate acts as the nurturing ground for your tomato slices, providing them with the essential nutrients and moisture they need to sprout successfully. The choice of substrate can vary, but a general-purpose potting mix is a good start, especially one that’s been pre-moistened to create the ideal environment for germination.
#### Step 2: Slicing Your Tomato
Select a ripe tomato and cut it into approximately half-centimeter thick slices. While it might seem wasteful, the goal here is to use slices that contain seeds, as these are your future tomato plants. Discard the end pieces without seeds, and prepare to plant the slices with seeds into your pot.
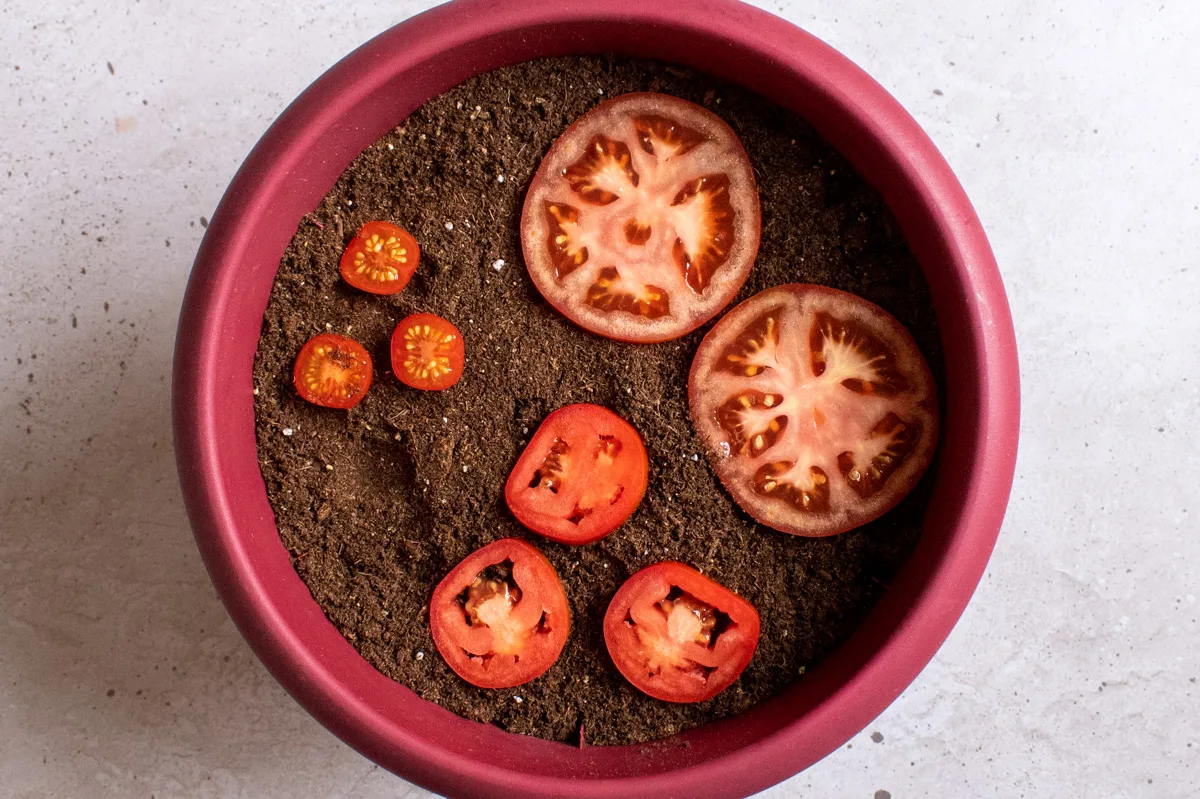
#### Step 3: Planting Tomato Slices
Lay the tomato slices flat on the surface of the pre-moistened substrate in your pot, ensuring they are evenly spaced. Once in place, gently cover them with an additional layer of substrate, about a centimeter thick. This step is crucial as it secures the tomato slices in a dark, moist environment, ideal for germination. It’s normal for the tomato slices to decompose as the seeds begin to germinate—this is a natural process and not cause for concern.
#### Step 4: Germination and Care
After planting, press down lightly on the substrate to ensure good contact between the tomato slices and the substrate. If your substrate wasn’t pre-moistened, now is the time to water gently. Place the pot in a location that receives indirect sunlight, such as near a window inside your house. Within a week, you should start to see sprouting, indicating that your seeds have successfully germinated.
#### Step 5: Transplanting Sprouts
About ten days after germination, your tomato plants should display both cotyledons (the first leaves) and the beginnings of true leaves. This is the perfect time to transplant the stronger sprouts into individual seedling pots to allow for more space and resources to grow. A sustainable option for seedling pots can be created from recycled materials, such as the cardboard tubes from toilet paper rolls. This method not only provides an excellent growing environment for your young tomato plants but also promotes recycling and reduces environmental impact.
Fill your recycled seedling pots with a universal potting mix, preferably peat-based for its water retention and nutrient content. Carefully select robust sprouts, gently teasing them out to avoid damaging the roots, and plant them individually in the prepared pots. Cover lightly with more substrate and water as needed.
#### Final Thoughts
As your tomato plants grow in their seedling pots, they will soon be ready to move to their final growing location, whether in a garden bed, larger pots, or a greenhouse. This method of starting tomato plants from slices not only simplifies the germination process but also offers a rewarding gardening project that is accessible to everyone, from beginners to seasoned gardeners.
Remember, gardening is an adventure that rewards patience, care, and a bit of creativity. By following these steps, you’ll be on your way to growing healthy, productive tomato plants from a simple slice of tomato.