
Introduction:
Greetings to all! In this article, we’ll delve into the fascinating world of medlar seed germination and explore a step-by-step guide on how to achieve success in growing these small seeds into thriving seedlings. From selecting ripe fruits to nurturing the seeds, we’ll cover it all.
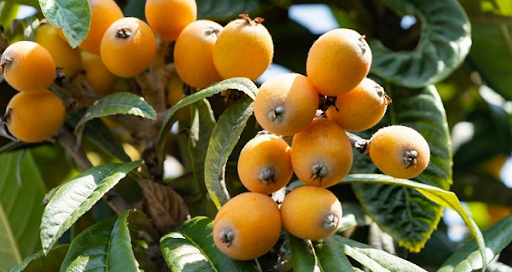
Section 1: Finding the Perfect Fruits
The first crucial step is identifying ripe medlar fruits. Look for fruits that have matured, and even slightly overripe ones are ideal. These fruits harbor seeds ready for germination. Pay attention to the appearance and texture, ensuring they are suitable for the next phase.
Section 2: Extracting the Seeds
Once you’ve obtained the ripe fruits, the next step involves extracting the seeds. A simple method involves using a knife to cut open the fruit and carefully separating the seeds. Look for seeds within the fleshy part, as these are the ones ready for germination.
Section 3: Seed Preparation and Washing
After extracting the seeds, a crucial step is to wash them thoroughly to eliminate any remaining fruit residues. This is essential to prevent potential contamination and the development of harmful microorganisms that could affect seed germination.
Section 4: Softening the Seeds
To enhance the germination process, consider soaking the seeds in water for approximately 24 hours. This softens the seeds, promoting easier sprouting and encouraging the outer skin to loosen.
Section 5: Planting Options
There are two main methods for planting medlar seeds: directly into the soil or using a transparent, airtight container. The latter allows you to observe the germination stages, making it an excellent option if you’re curious about the seed development process.
Section 6: Seed Germination and Care
Whether you choose to plant directly in the soil or in a container, regular monitoring is crucial. Within a few weeks, you’ll notice the seeds sprouting. At this point, consider transplanting the seedlings to individual containers to promote healthy growth without compromising their development.
Section 7: Tips for Successful Growth
Ensure the soil mixture for planting consists of a 20% expanded clay and 80% peat mix. This combination provides optimal conditions for medlar seedlings to thrive. Regularly water the plants, but avoid overwatering to prevent root rot.
Conclusion:
Growing medlar seeds can be a rewarding experience. With careful selection, preparation, and nurturing, you can transform small seeds into vibrant medlar seedlings. Follow this comprehensive guide, and you’ll soon witness the beauty of successful medlar seed germination.