
Introduction:
Greetings to all plant enthusiasts! In today’s informative guide, we will delve into the fascinating world of rubber plant propagation. I’ll be sharing two techniques that have proven to be highly successful in multiplying the resilient Ficus elastica. Whether you’re a seasoned gardener or a beginner, these methods are simple yet effective, ensuring you achieve thriving results.
Section 1: Propagation Techniques
Let’s explore the two techniques for rubber plant propagation: using a single leaf and employing a small stem cutting. Both methods are straightforward and yield excellent results.
1.1 Propagation through a Single Leaf:
To begin, select a healthy and robust plant. Opt for leaves that are pristine, free from any signs of fungal or bacterial contamination. This ensures a clean start for your propagation journey.
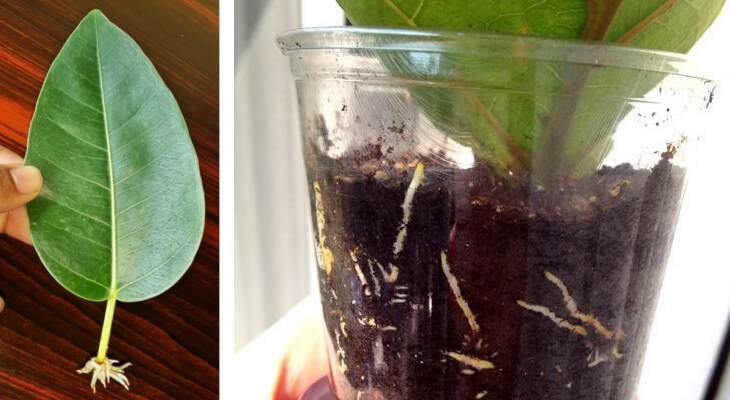
Start by gently detaching a leaf from the mother plant. Ensure it is intact and undamaged. This leaf will serve as the foundation for the new rubber plant.
Fill a glass with almost lukewarm water and insert the leaf, making sure it is submerged. Place the glass in a well-lit area, avoiding direct sunlight, and ensure the water level is consistently maintained.
It is crucial to use distilled or filtered water to prevent any unwanted contaminants. This initial step kickstarts the development of the root system.
1.2 Propagation through a Small Stem Cutting:
Similarly, choose a healthy plant with a single stem and pristine leaves. The key is to select a plant that is untouched by pests or diseases.
Carefully cut a section of the stem, ensuring it is at least a few inches long. This cutting will serve as the basis for a new rubber plant.
Place the stem cutting in a glass of water, making sure the water covers the end of the stem. Again, position the glass in a well-lit area without direct sunlight exposure.
Section 2: Nurturing the Propagated Plant
After approximately twenty days, you will observe the development of the root system. At this point, transfer the rooted cutting into a pot filled with a quality potting mix or universal soil.
Ensure the pot has drainage holes and water the plant thoroughly. It is essential to keep the soil consistently moist, promoting healthy growth.
Place the pot in a well-lit area, but avoid direct sunlight exposure. Remember to water the plant regularly, keeping the soil consistently damp.
Section 3: Observing Growth and Success
Over the next few weeks, closely monitor the plant’s progress. You will witness the emergence of new shoots and leaves, indicating the successful establishment of your propagated rubber plant.
Conclusion:
In just a few short weeks, you’ll have a flourishing rubber plant, thanks to these simple yet effective propagation techniques. By following these steps, you can enjoy the satisfaction of nurturing new life and expanding your indoor jungle.